

If we’re being honest… You didn’t end up reading about damp for fun. You’re here because something inside your home doesn’t feel right.
The windows drip every morning, the bedroom smells musty, or you’ve started Googling “how to stop mould on walls” because those tiny black specks are spreading faster than you expected.
And the last thing you want is another vague article telling you to “open a window” while you subconsciously wonder if you should look for builders near you or buy wall damp proofing products instead.
Here’s the part most people never hear: in the UK, the majority of indoor damp isn’t structural at all.
It’s caused by the way moisture builds up, gets trapped and cools on surfaces during the colder months, i.e., the perfect storm created by heating habits, ventilation blind spots and the way rooms are laid out.
This blog is here to give you the clear, practical, room-by-room advice that actually fixes the root of the problem. No jargon. No scare tactics. Just the exact changes that stop damp from forming in the first place and keep your home warm, dry and healthy all year round.

Why Does Damp Form Indoors in UK Homes?
Indoor damp in the UK isn’t usually caused by leaks or structural faults.
It mostly depends on how moisture behaves inside tightly sealed, modern homes. There is double glazing, insulation, and draught proofing that keeps the heat pretty well. But it also traps the moisture created by everyday activities.
At the heart of most issues is simple condensation dampness.
When warm, moist air meets a cold surface, like a window, external wall or the corner of a bedroom. It instantly turns into water droplets. This happens because the air reaches its “dew point,” meaning it can’t hold any more moisture, so it releases it onto the nearest cold spot.
Bedrooms often show this first.
Windows stay closed through the night, radiators are turned down, and one or two people breathe out warm air for hours. By morning, the room is cooler, the surfaces are colder and the moisture in the air settles wherever it can.
Typical UK winter habits add to this: homes stay shut for long periods, heating goes on and off, and laundry is often dried indoors. Everyday activities like cooking, showering and even making tea all add surprising amounts of moisture to the air, far more than most people realise.
In the majority of cases, indoor damp is preventable.
You don’t need major building work or constant use of a dehumidifier for damp. Once you understand why moisture settles where it does, the right ventilation and heating habits make a huge difference to how dry your home feels.
Also Read: How to Choose the Best Basement Dehumidifier?
Don’t Ignore These 8 Early Signs of Interior Damp
Indoor damp rarely appears out of nowhere.
It usually gives you small warnings first, like something is off with the airflow, temperature or moisture levels inside your home. Spotting these issues early can help you deal with them before they spread or damage the walls, furniture or paintwork.
- Morning moisture on windows and sills: Waking up to wet glass or puddles on the ledge is one of the earliest signs of excess moisture, especially in bedrooms.
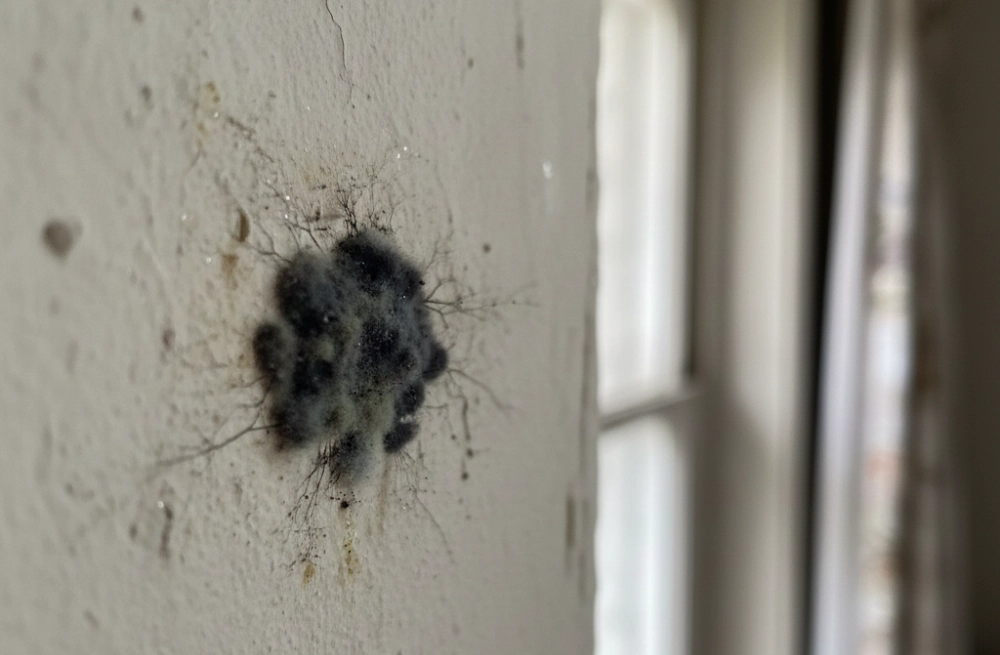
- Black specks around window frames or bathroom corners: Tiny dots on silicone or grout show mould beginning to settle where moisture lingers.
- Cold or damp-feeling patches on internal walls: If a wall feels damp or unusually cold, it can be the start of dampness in corner of room that later becomes visible.
- A musty or “old house” smell: A stale smell after cleaning usually means moisture is trapped in fabrics and soft furnishings.
- Condensation behind furniture: When furniture sits tight against external walls, airflow drops and damp patches form out of sight.
- Clothes feeling damp inside wardrobes: Cool, slightly moist clothing means there is trapped humidity, which is when many homeowners search “how to stop damp in wardrobes”.
- Mould spots on soft furnishings: Curtains, blinds, cushions and mattresses can develop small dark marks when moisture build-up is ignored.
- Flaking paint or bubbling plaster: Paint that peels or bubbles means the wall has been damp for a while and needs attention.
Why do these early signs of damp matter? Because most of these signs have simple causes and even simpler fixes. In the next section, we’ll look at how to control indoor moisture so these problems don’t return or spread any further.
How to Control Moisture Inside Your Home?
How to reduce condensation on walls throughout your home?
Indoor damp can happen with everyday routines that we are not aware of. By just a few changes in lifestyle habits, we can find out where the most humidity comes from and how to not let it settle on cold surfaces.
Take a look at easy-to-adopt and reliable tips for maintaining damp-free interiors:
Reduce Moisture at the Source
Moisture is easiest to control at the moment it’s created. Instead of trying to remove humidity afterwards, these simple adjustments help you prevent the air from becoming saturated in the first place.
- Cooking habits: Lids on pans keep steam contained, and running the extractor fan during cooking (and for a little while after) pushes moisture outdoors rather than into cooler rooms. Closing the kitchen door helps contain humidity so it doesn’t drift through the house.
- Shower and bath routines: Bathrooms generate heavy moisture in a short time. A fan or cracked window gives that steam an escape route, and keeping the door closed stops it spreading. Running the bath with cold water first reduces steam, and wiping tiles or screens removes what the air would otherwise hold onto.
- Drying clothes indoors: Dry clothes outdoors as much as possible, or dry them in a bathroom with windows open and a fan running. Radiators are convenient, but they also release a large amount of humidity in the home.
- Moisture-producing heaters: Heaters with paraffin and bottled gas can give off moisture as they burn. They warm the room but push humidity in the air. Avoid them as much as possible.
Most of these changes are small, but together they dramatically cut down the amount of moisture floating around your home each day. With less humidity produced in the first place, you’ve already prevented half the battle.
These are small changes to make, but together, they are quite effective in cutting moisture floating around your home every day.
Remove Moisture Before It Settles
Even with good habits, some humidity will always remain in the air. The key is catching it early, before it settles into cold corners, behind furniture, or across window frames.
- A simple morning wipe-down: A quick wipe of windows, sills and tiles removes the moisture that naturally collects overnight, stopping it from dripping into corners where damp usually begins.
- Humidity sensors (hygrometers): It’s a device that records the room’s humidity level. Ideal levels should be below 55%. With this little device, you can understand which areas in your home see a spike overnight and act accordingly.
- Dehumidifiers: Useful in bedrooms overnight, after showers or in small flats with limited airflow. They don’t replace ventilation but give the home a helpful boost when humidity is high. They work best when placed away from walls so air can circulate freely.
Clearing moisture before it settles keeps it off cold walls, corners and window frames. Once you’ve reduced what’s in the air, good ventilation becomes far more effective and far easier to maintain.
How to Improve Airflow, Warmth & Breathability Indoors?
Here’s how to avoid mould in house throughout the year: focus on improving airflow and warmth isn’t just about comfort. Look at some of the small adjustments that work together to create a home where moisture has fewer places to settle:
Ventilation (Without Losing Heat)
| What to Do | Why It Helps |
|---|---|
| 10–20 min quick ventilation | Short bursts push out warm, moist air and pull in cool, dry air without losing much heat. |
| Morning bedroom ventilation + airing bedding | Bedrooms gather the most overnight moisture; opening windows + throwing back bedding helps it escape. |
| Use trickle vents year-round | Modern homes trap moisture; trickle vents restore slow, natural airflow. |
| Leave gaps behind wardrobes/cupboards | Prevents stagnant air pockets where damp quietly develops. |
| Vent sealed chimneys and flues | A small vent stops moisture sitting inside sealed cavities. |
Heating Your Home the Right Way
| What to Do | Why It Helps |
|---|---|
| Low, consistent heating | Keeps walls warm enough to stop moisture condensing on cold surfaces. |
| Avoid heating only one room | Warm air drifting into colder rooms causes immediate condensation. |
| Use TRVs + thermostats wisely | Balanced room temperatures reduce cold spots where moisture settles. |
| Don’t block radiators | Helps heat reach corners and walls evenly, reducing damp-prone cold patches. |
Arrange Furniture to Improve Airflow
| What to Do | Why It Helps |
|---|---|
| Leave small gaps behind furniture | Prevents cold pockets and hidden damp patches from forming. |
| Avoid wardrobes on external/north-facing walls | These walls stay colder, making them prime spots for condensation. |
| Declutter corners | Allows warm air to circulate through the room more evenly. |
Choose Breathable, Moisture-Resistant Materials
| What to Do | Why It Helps |
|---|---|
| Use breathable paints | Lets walls release trapped moisture instead of sealing it in. |
| Apply anti-mould coatings where needed | Ideal for bathrooms, kitchens, behind furniture and other high-moisture areas. |
| Choose breathable plaster | Supports drying-out of walls rather than trapping humidity. |
| Avoid vinyl wallpaper | Vinyl traps moisture between the paper and wall, causing hidden mould. |
| Clean/replace silicone sealant regularly | Old or blackened silicone gives mould places to grow. |
| Don’t rely solely on wall damp proofing products | These help, but breathable materials stop moisture from getting trapped in the first place. |
These airflow and material changes don’t need big renovations; they simply help your home breathe. When warmth, ventilation and furniture layout work together, moisture has far fewer places to sit, making the rest of your damp-prevention routine much easier.
Related Reading: Basement Ventilation Solutions for Musty Odors and Humidity
Daily and Weekly Damp-Free Home Routine (Checklist)
Once your home has the right airflow and warmth, the final piece is what you do day-to-day. Damp prevention is about quiet habits that stop mould growth long before it settles. These routines make a real difference, especially through winter, and form the practical side of every homeowner’s approach to tips for maintaining damp-free interiors.
Daily Routine
- Wipe windows & sills each morning: Removes overnight moisture before it drips into corners.
- Keep bathroom and kitchen doors shut during moisture-heavy tasks: Stops steam spreading through the home.
- Use extractor fans when cooking or showering: Helps moist air escape quickly.
- Crack windows for 10–20 minutes: A quick air change works better than leaving them open for hours.
- Throw back bedding after waking up: Bedrooms trap a lot of night-time humidity.
- Check indoor humidity with a hygrometer: Aim for 45–55% to keep damp away.
Weekly Routine
- Check wardrobe corners: Closed spaces can trap moisture fast.
- Air out rooms that stay closed most of the week: Prevents cold, stale air pockets.
- Clean extractor fan filters: Dirty filters reduce airflow.
- Run a dehumidifier on laundry days: Indoor drying creates major moisture spikes.
- Look behind furniture for cold or damp patches: These spots often warn of early damp buildup.
These tiny routines take minutes, but together they stop moisture from building up quietly in the background, keeping your home consistently dry, warm and healthy.
How to Clean and Treat Black Mould Safely? (Do’s & Don’ts)
When mould first appears indoors, most small patches caused by everyday condensation can be cleaned safely at home. The goal here is to remove the mould, stop it from spreading, and leave the surface ready for proper treatment if you plan to refresh the area later.
Safe Cleaning Steps
Use these steps for light, surface-level mould on window frames, grout, silicone, internal corners, and painted walls. They are ideal for anyone learning how to treat damp walls internally DIY:
- Wipe with a damp cloth and dispose of it immediately. It lifts mould without releasing spores into the air.
- Vacuum with a HEPA filter if you have one. This helps remove loose spores on skirting boards and nearby surfaces.
- Apply a fungicidal wash or diluted bleach, but always test a small hidden patch first and wear gloves.
- Let the area dry completely because moisture left behind encourages regrowth.
- Finish with anti-mould paint if repainting. It creates a resistant layer that stops moisture turning into mould again.
These steps remove existing mould and make the surface safer for long-term treatment or decorating.
Also Read: Affordable Ways Damp Proof a Room?
What NOT to Do
Avoid these mistakes; they don’t stop mold on walls, they make it spread faster:
- Never dry-brush mould. This flicks spores around the room.
- Don’t paint over mould. The paint traps moisture, and thus, there is bubbling and mould regrowth.
- In case of repeated patches, there is moisture trapped or another likely cause. Don’t ignore this regrowth.
When to Call a Professional — and How Damp-Solutions Can Help
Most indoor damp comes from everyday moisture and airflow, but some signs point to something deeper, the kind of issue no amount of wiping, heating or better ventilation will solve. You’ll need to call a professional if you notice:
- A tide mark low on walls
- Damp patches that never dry
- Plaster bubbling or crumbling
- White powdery salts on plaster
- A persistent damp smell in one area
- Mould returning days after cleaning
- Moisture that appears after rain rather than daily routines
- Localised wall condensation only at the base of walls or in one room
These usually indicate rising damp, penetrating damp or hidden plumbing leaks, i.e., problems that lifestyle changes or DIY fixes can’t fully address.
How Can We Support You?
We at Damp2Dry Solutions do damp surveys using moisture meters, salt testing and thermal imaging to identify the exact cause.
This avoids guesswork and tells you what will genuinely resolve the problem long-term, whether it’s a ventilation correction or a structural fix, which is especially important if you keep trying to figure out how to stop damp in bedroom areas that never seem to improve.
You get a clear, no-pressure diagnosis and practical solutions tailored to your home. If something hasn’t felt right for a while, our no-obligation, honest damp survey helps you stop the issue at its source and protect your home year-round.
Get in touch with us by calling us on 01606-872-691 or filling out the form, and our damp specialists will assess your situation, answer your questions and arrange a survey, if needed.